")
You flirt with your eyes because they are the windows to the soul. Last week’s wedding was a disaster, despite you looking beautiful, your eyes were a big letdown, with your eyelashes looking like foreign invaders that didn’t belong. You’re worried about the upcoming party, but your lashes won’t cooperate. Applying another layer of mascara makes them feel like a black mountain that could collapse at any moment.
Stop feeling sorry for yourself! Let’s give this sad story a happy ending. Let’s be blunt. The solution to your messy lashes is a lash lift and tint. No, a lash lift is not the same as lash extensions. Many women confuse the two. We don’t recommend lash extensions because they make your lashes look unnatural and are very expensive.
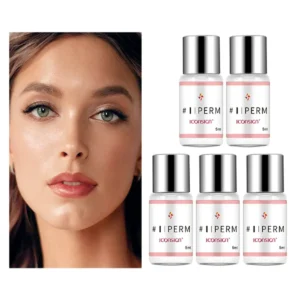
On the other hand, the lash lift can be done at home by yourself. It can enhance the natural look of your lashes and make them beautifully curled. Moreover, the effect of a lash lift can last for up to 8 weeks, and you can even apply mascara to your lashes. What could be more perfect than that?
Now that you know the wonders of a lash lift kit, here’s how to do a lash lift at home.
Table of Contents
Eyelash Lift
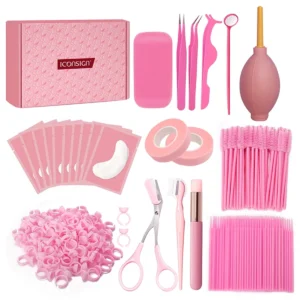
- Preparation: Before doing a lash lift, you must clean your face to ensure that no dust or oil may interfere. Additionally, you need to do a skin test behind your ear to ensure you’re not allergic to the products in the lash lift kit.
- Lash Patch: First, stick a small patch on your eyelid to position and hold your lashes. Be careful not to rub your eyes or make sudden eye movements, which may cause your lashes to fall out.
- Lash Setting: Use a professional lash curler to curl and position your lashes on the patch. Next, use a lash brush to separate your lashes for the next step.
- Apply adhesive glue: Use an eyelash brush to apply thick adhesive glue onto the eyelashes. This process requires patience and waiting a few minutes until they are all glued together, then letting them dry.
- Eyelash shaping: After the eyelash growth serum is absorbed, the beautician will use an eyelash curler again to shape your eyelashes and position them on the patch. This process requires patience and waiting for a few minutes until the eyelash shaping is complete.
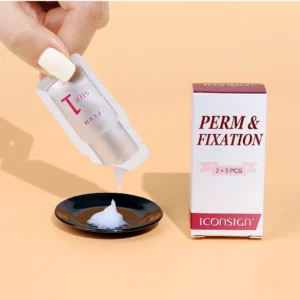
- Use perm lotion: Apply an appropriate amount of perm lotion evenly to the roots of the eyelashes. If the lotion is applied to the eyelashes, they will loosen. Then cover the entire eyelashes with plastic wrap and wait for 12 to 15 minutes.
- Apply repairing lotion: After cleaning the perm lotion on the eyelashes with a cotton pad, apply the repairing lotion evenly to the roots of the eyelashes, and cover the eyebrows with plastic wrap, waiting for 8-12 minutes, so that the repairing lotion can be better absorbed by the eyelashes.
- Clean your eyelashes: Use the cleansing solution in the eyelash lift kit to clean any residue on your eyelashes. Ensure there is no adhesive left on the eyelashes. Otherwise, your eyelashes will become excessively curled within a day or two.
- Apply nourishing lotion: Gently apply nourishing lotion onto the eyelashes with a cotton swab, and comb the eyelashes with an eyelash brush to achieve the most perfect state. Repeat the above steps on the other eye.
- Completion: After completing the eyelash lift, if you want even thicker and curlier eyelashes, you can apply mascara to make your eyelashes appear fuller. For the next 48 hours, the eyelashes must be kept dry. Avoid using cosmetics to avoid affecting the fixing effect of eyelashes. You can also use beauty oil or gel to help maintain the elasticity and health of your eyelashes.
")
Eyelash Tint
You may now be interested in purchasing the eyelash lift kit. Still, this kit not only lifts the eyelashes but also dyes them! Here are the specific steps:
- Preparation: Before starting, please make sure that your eyelashes and the skin around your eyes are clean and dry. You can use a cotton pad, water, or facial cleanser to clean your eyes. Then place a cover pad or tape under the lower eyelid to avoid the dye coming into contact with the skin.
- Dyeing: Using eyelash dye, evenly apply a layer of colour to your eyelashes. Use a cotton swab or pad to gently wipe off any excess dye on your lashes. Let the dye sit for 5-10 minutes, then rinse off with warm water.
- Apply nourishing oil: Using a cotton swab, apply nourishing oil to your eyelashes. Let it soak for 5 minutes, then use a cotton swab to remove any residue.
")
Conclusion
To summarize, eyelash lifting and dyeing is a quick and simple beauty technique that can make your eyelashes look fuller, more natural, and more attractive. Just follow the above step-by-step guide, and you can easily complete this technique at home and enjoy beautiful lashes for some time. Of course, you can also consider purchasing an affordable and easy-to-use eyelash lifting and dyeing kit on the ICONSIGN website.