")
So soon we meet again! Just solved the problem with lashes. The lash now looks curled and longer, very perfect. But now, a new problem has arisen: the shape of your brows may not be perfect enough.
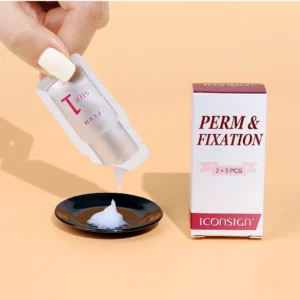
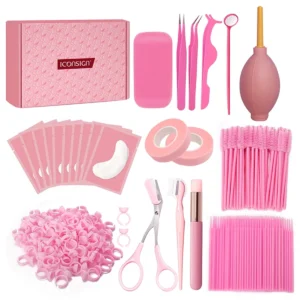
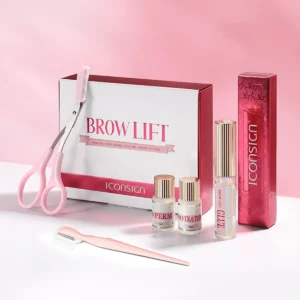
Do you have the ICONSIGN lash lift kit? If you have already purchased and used it, you will be surprised by its practicality and portability. Because the ICONSIGN lash lift kit can also be used for brow lamination. It’s really amazing, and you will save $40!
If you haven’t used the ICONSIGN lash lift kit yet, purchase it on the ICONSIGN website. Purchasing on the website is very easy. Currently, the website offers discounts for first-time buyers, so you can get the ICONSIGN lash lift kit at the most affordable price. If you purchase it, you can refer to our ICONSIGN lash lift kit user guide, which provides detailed instructions for easy mastery of the lash lifting method. This ICONSIGN lash lift kit can also help you achieve brow lamination. The operation steps for lash lifting and brow lamination are similar, except for some initial steps.
Table of Contents
What Is Brow Lamination?
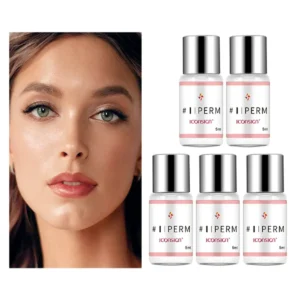
Brow lamination is a beauty technique that uses a special dye and glue to simulate a thicker and more three-dimensional brow effect on natural brows. This technique is also known as “microblogging” or “3D brow embroidery.”
Before performing brow lamination, the beautician will first design the most suitable brow shape based on the customer’s brow shape and face shape and then use some special tools and techniques to apply the dye and glue to the brows to make them thicker and more natural. The entire process takes about 1-2 hours. Depending on the individual’s brow growth rate and care, the effect can last for several weeks to several months.
You can try brow lamination if your brow shape is not perfect enough or messy. Brow lamination can make your brows look more natural, and you can have beautiful brow effects without makeup every day. The brow lamination kit can help you easily achieve thick and three-dimensional brows at home.
Next, we will share with you the detailed process of brow lamination. If you want to dye your brows after lamination, we will also provide a tutorial for that later. Before doing brow lamination, you can take a photo of your original brows to compare with the results after lamination, which will help you see the differences more clearly.
")
Brow Lamination Process:
- Nourish your brows
Before lamination, apply nourishing oil to your brows with a cotton swab, gently massage the brows with your fingertips, and then remove any residue with a makeup cotton pad.
- Trim your brows
Use a brow comb to comb your brows, then use a brow pencil to draw your ideal brow shape, and trim any excess brow hair until the brow shape is ideal. Repeat these steps on the other brow.
- Clean your brows
Before brow lamination, clean any oily stains on your brows with the cleansing agent included in the brow lamination kit. Clean the brows and the surrounding skin, then use a dry makeup cotton pad to remove any water stains, ensuring the brows are dry.
- Apply adhesive
Put a suitable amount of adhesive on your brows, evenly apply it with a cotton swab, then comb your brows upwards with a brow brush to make them stand upright. Wait for 30 seconds. Note: If your natural brows are thick, you can reduce the amount of adhesive applied.
- Apply curling lotion
Apply the curling lotion evenly on your brows, ensuring every brow hair is covered with the lotion. Cover your brows with cling wrap, and gently press and stretch the wrap from both ends to ensure that the wrap completely covers the curling lotion. Wait for 15 minutes, then slowly peel off the cling wrap.
- Apply repair lotion
Gently remove the curling lotion with a cotton swab, then repeat step 5 with the repair lotion. Cover your brows with cling wrap and wait for 8 minutes.
- Wash your brows clean
If you find your brows are fluffy, you can clean them. Use the cleansing agent in the brow lamination kit, and use a cotton swab to thoroughly clean your brows.
- Apply nourishing lotion.
Use a cotton swab to apply the nourishing lotion on your brows, and use a brow brush to shape them.
- Your brows are now complete.
After layering your brows, they are now in the best condition, making your eyes full of charm and making you the most confident and beautiful person in the crowd. It’s time to wear beautiful clothes and show the world your unique beauty.
Now that the covering is done, colouring your brows is time.
")
How To Dye Your Brows
First, you need to prepare Vaseline, dye, cotton swabs, and nourishing oil. Use a clean cotton swab to apply Vaseline around your brows to prevent the dye from damaging your skin. Then, evenly apply the dye on your brows, ensuring every brow hair is covered with dye. Wait for 5 minutes, and then gently wipe off the dye with a damp cotton swab. Use a spoolie brush to comb your brows into the desired shape. Repeat the same steps on the other brow.
Use a cotton swab to apply nourishing essential oil to your brows, wait for 10 minutes, and then use a cotton swab to clean off any residue on your brows.
Notice: After colouring your brows, if you find that the colour near your ears is darker than your hair colour, this is normal. The dark colour on the surface of your brows will gradually fade away with metabolism, and it can be eliminated after about three washes.
")
Conclusion
Finally succeeded! Following the above steps, you can also successfully achieve the layered effect on your brows using an lash lift kit. Is the lash lift kit worth buying? The answer is yes. It can affect not only save you money but also save you time. You can complete both brow layering and brow colouring in just one hour and get double the beauty for your money. You can easily purchase the ICONSIGN lash lift kit here.